CV Joint Noise: Top Causes & How to Fix Them
Introduction
The Constant Velocity (CV) joint is a crucial component of a vehicle’s drivetrain, allowing power to be transmitted smoothly from the transmission to the wheels while accommodating suspension movement. When a CV joint fails, it often produces distinct noises, signaling the need for immediate attention. Ignoring these sounds can lead to complete joint failure, leaving your vehicle undrivable.
In this comprehensive guide, we’ll explore:
✔ What a CV joint is and how it works
✔ Common CV joint noise symptoms
✔ Top causes of CV joint noise
✔ How to diagnose a bad CV joint
✔ Step-by-step repair and replacement guide
✔ Preventive maintenance tips
By the end, you’ll know exactly how to identify, troubleshoot, and fix CV joint noise before it causes major damage.
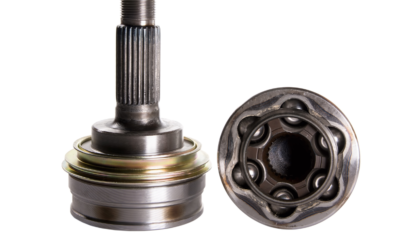
1. What Is a CV Joint & How Does It Work?
A CV joint (Constant Velocity joint) is part of the drive axle assembly in front-wheel-drive (FWD), all-wheel-drive (AWD), and some rear-wheel-drive (RWD) vehicles. Its primary function is to transfer power from the transmission to the wheels while allowing for suspension movement and steering angles.
Types of CV Joints:
- Inner CV Joint – Connects the transmission to the axle shaft.
- Outer CV Joint – Connects the axle shaft to the wheel hub.
Both joints are protected by a rubber or thermoplastic boot filled with grease to prevent dirt and moisture from entering.
How CV Joints Work:
- As the suspension moves up and down, the CV joint adjusts to maintain a constant speed between the transmission and wheels.
- The ball bearings inside the joint allow for smooth rotation at different angles.
- A damaged or worn CV joint loses its ability to maintain constant velocity, leading to vibrations, clicking noises, and eventual failure.
2. Common CV Joint Noise Symptoms
A failing CV joint produces distinct sounds that worsen over time. Here are the most common noises to listen for:
A. Clicking or Popping Noise When Turning
- Most common symptom of a bad outer CV joint.
- Occurs when making sharp turns (left or right).
- The noise increases with speed and turning angle.
B. Clunking or Knocking Noise During Acceleration
- Suggests a worn inner CV joint.
- Heard when accelerating or decelerating.
- May feel like a “thud” under the vehicle.
C. Constant Humming or Grinding Noise While Driving
- Indicates lack of lubrication or joint wear.
- Gets louder at higher speeds.
- Could also signal a failing wheel bearing (requires diagnosis).
D. Vibration at Highway Speeds
- A damaged CV joint can cause excessive vibration in the steering wheel or floorboard.
- Often confused with wheel balance issues.
E. Grease Leakage from the CV Boot
- A torn or cracked CV boot allows grease to escape.
- Leads to dirt and moisture contamination, accelerating joint wear.
3. Top Causes of CV Joint Noise
Understanding why CV joints fail helps in preventing future issues. Here are the most common causes of CV joint noise:
1. Torn or Damaged CV Boot
- The #1 cause of CV joint failure.
- A cracked or split boot allows dirt, water, and debris to enter.
- Without lubrication, the joint wears out quickly.
Fix: Replace the CV boot and repack with grease.
2. Lack of Lubrication
- If the CV joint runs dry due to grease leakage, metal-on-metal contact occurs.
- Causes grinding noises and rapid wear.
Fix: Clean and repack the joint with high-temperature CV grease.
3. Worn-Out CV Joint Bearings
- Over time, the ball bearings and races inside the joint wear down.
- Leads to play and clicking noises.
Fix: Replace the entire CV joint or axle assembly.
4. Impact Damage (Potholes, Curb Hits)
- Hard impacts can bend or crack the CV joint housing.
- Causes vibration and clunking.
Fix: Inspect for physical damage; replace if necessary.
5. Corrosion Due to Water Intrusion
- If water enters through a damaged boot, it causes rust and pitting inside the joint.
- Leads to grinding and stiffness.
Fix: Replace the joint and install a new boot.
6. Excessive Angle Stress (Lifted or Lowered Vehicles)
- Extreme suspension modifications can overwork the CV joint.
- Causes premature wear and binding noises.
Fix: Use heavy-duty CV joints or correct suspension geometry.
4. How to Diagnose a Bad CV Joint
Before replacing a CV joint, confirm the issue with these diagnostic steps:
Step 1: Listen for Noises
- Drive in a quiet area and listen for:
- Clicking when turning → Outer CV joint issue.
- Clunking when accelerating → Inner CV joint issue.
Step 2: Inspect the CV Boots
- Look for:
- Grease leaks around the boot.
- Cracks or tears in the rubber.
- Dirt inside the joint (sign of contamination).
Step 3: Check for Play in the Joint
- Lift the vehicle and grab the axle shaft.
- Try to wiggle it up and down – excessive movement indicates wear.
Step 4: Test Drive with Load Changes
- Accelerate hard → Listen for clunks (inner joint).
- Turn sharply → Listen for clicks (outer joint).
5. How to Fix CV Joint Noise (Repair & Replacement Guide)
Depending on the damage, you can either repack and reboot or replace the entire CV joint/axle.
Option 1: CV Boot Replacement (If Caught Early)
Tools Needed:
- Jack & jack stands
- Socket set
- CV boot kit (with grease & clamps)
- Grease gun
- Pry bar
Steps:
- Lift the vehicle and remove the wheel.
- Disconnect the axle from the hub (may require removing the brake caliper).
- Remove the old boot, clean the joint thoroughly.
- Repack with fresh grease and install the new boot.
- Secure with clamps and reassemble.
Option 2: Full CV Joint or Axle Replacement
If the joint is severely damaged, replacement is necessary.
Steps:
- Remove the axle from the transmission and wheel hub.
- Press out the old CV joint (or replace the entire axle assembly).
- Install the new joint/axle and secure it.
- Refill transmission fluid (if needed).
Cost Estimate:
- CV Boot Kit: 20−50
- CV Joint Only: 80−150
- Complete Axle Assembly: 100−300 (recommended for easier installation)
6. Preventive Maintenance Tips
To extend CV joint life, follow these tips:
✔ Inspect CV boots every oil change (look for cracks/leaks).
✔ Avoid harsh impacts (potholes, curbs).
✔ Keep joints lubricated (replace torn boots immediately).
✔ Check for unusual noises early.
Conclusion
CV joint noise is a warning sign that should never be ignored. Whether it’s a clicking sound when turning or a clunk during acceleration, diagnosing and fixing the issue early can save you from costly repairs.
Key Takeaways:
✅ Clicking = Outer CV joint issue
✅ Clunking = Inner CV joint issue
✅ Torn boots are the #1 cause of failure
✅ Repack or replace before complete failure
By following this guide, you can identify, diagnose, and fix CV joint noise before it leaves you stranded. If in doubt, consult a professional mechanic for a thorough inspection.