The stabilizer bar (also known as the sway bar or anti-roll bar) is a crucial component of a vehicle’s suspension system. It helps reduce body roll during cornering, improving stability and handling. Over time, the bushings that secure the stabilizer bar to the chassis can wear out, leading to clunking noises, reduced handling performance, and even suspension damage.
Replacing stabilizer bar bushings is a common maintenance task that can significantly improve ride quality. This guide covers everything you need to know about stabilizer bar bushing replacement, including symptoms of worn bushings, tools required, step-by-step instructions, and maintenance tips.
Table of Contents
-
What Are Stabilizer Bar Bushings?
-
Symptoms of Worn Stabilizer Bar Bushings
-
Tools and Materials Needed for Replacement
-
Step-by-Step Stabilizer Bar Bushing Replacement Guide
-
Preparation and Safety
-
Jacking Up the Vehicle
-
Removing the Old Bushings
-
Installing New Bushings
-
Reassembly and Testing
-
-
Tips for Extending Bushing Lifespan
-
When to Seek Professional Help
-
Conclusion
1. What Are Stabilizer Bar Bushings?
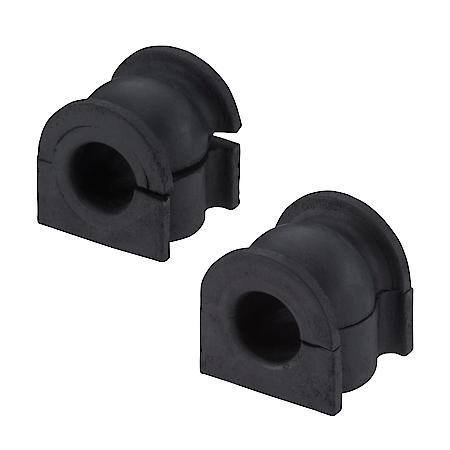
Stabilizer bar bushings are rubber or polyurethane components that cushion the connection between the stabilizer bar and the vehicle’s frame or control arms. They allow slight movement while preventing metal-on-metal contact, reducing noise and vibration.
Types of Stabilizer Bar Bushings:
-
Rubber Bushings: OEM-standard, softer, and quieter but wear out faster.
-
Polyurethane Bushings: More durable, improve handling, but may transmit more road noise.
Over time, exposure to heat, road debris, and oil can cause bushings to crack, harden, or disintegrate, necessitating replacement.
2. Symptoms of Worn Stabilizer Bar Bushings
Recognizing the signs of failing bushings can prevent further suspension damage:
A. Clunking or Rattling Noises
-
A common symptom when driving over bumps or rough roads.
-
Caused by excessive movement between the bar and mounting brackets.
B. Poor Handling and Excessive Body Roll
-
Worn bushings reduce the stabilizer bar’s effectiveness, leading to swaying during turns.
C. Uneven Tire Wear
-
Improper suspension movement can cause irregular tire tread wear.
D. Visible Damage
-
Inspect the bushings for cracks, splits, or missing chunks.
If you notice these symptoms, inspect the bushings and replace them if necessary.
3. Tools and Materials Needed for Replacement
Before starting, gather the following:
Tools:
-
Floor jack and jack stands
-
Wheel chocks
-
Lug wrench
-
Socket set and ratchet
-
Pry bar or large screwdriver
-
Torque wrench
-
Lubricant (silicone-based for rubber, grease for polyurethane)
Materials:
-
New stabilizer bar bushings (match size and material to OEM specs)
-
Replacement brackets or bolts (if corroded or damaged)
4. Step-by-Step Stabilizer Bar Bushing Replacement Guide
A. Preparation and Safety
-
Park the vehicle on a level surface and engage the parking brake.
-
Loosen the lug nuts on the wheels (but do not remove yet).
B. Jacking Up the Vehicle
-
Lift the front or rear (depending on which bushings are being replaced) using a floor jack.
-
Secure the vehicle on jack stands for safety.
-
Remove the wheels for better access.
C. Locating the Stabilizer Bar and Bushings
-
The stabilizer bar runs horizontally across the suspension, connected to the control arms or struts via end links.
-
The bushings are mounted to the frame with brackets.
D. Removing the Old Bushings
-
Spray penetrating oil on the bracket bolts if they’re rusted.
-
Unbolt the stabilizer bar brackets using a socket wrench.
-
Carefully pry the old bushings off the bar using a screwdriver.
-
Clean the stabilizer bar mounting area with a degreaser.
E. Installing New Bushings
-
Apply lubricant to the new bushings (silicone spray for rubber, grease for polyurethane).
-
Slide the bushings onto the stabilizer bar in the correct orientation.
-
Reattach the brackets and tighten the bolts snugly (but do not fully torque yet).
F. Reassembly and Testing
-
Reinstall the wheels and lower the vehicle.
-
Torque all bolts to the manufacturer’s specifications (typically 25-40 ft-lbs for brackets).
-
Test drive the vehicle to check for noises or handling improvements.
5. Tips for Extending Bushing Lifespan
-
Regular Inspections: Check bushings during oil changes or tire rotations.
-
Avoid Harsh Chemicals: Oil and brake fluid can degrade rubber bushings.
-
Use Quality Bushings: OEM or high-performance polyurethane bushings last longer.
-
Proper Lubrication: Prevents squeaking and premature wear.
6. When to Seek Professional Help
If you encounter:
-
Severely rusted or seized bolts
-
Damaged stabilizer bar or brackets
-
Persistent noises after replacement
A professional mechanic can ensure proper installation and diagnose additional suspension issues.
7. Conclusion
Replacing stabilizer bar bushings is a straightforward DIY job that can restore your vehicle’s handling and eliminate annoying suspension noises. By following this guide, you can ensure a smooth and safe repair process. Regular maintenance and using high-quality bushings will extend their lifespan, keeping your ride comfortable and stable for years to come.
If you’re unsure about any step, consult a repair manual for your specific vehicle or seek professional assistance. Safe driving starts with a well-maintained suspension!