The rocker arm assembly is a crucial component in an internal combustion engine, responsible for transferring motion from the camshaft to the valves. Over time, wear and tear can lead to issues such as noise, poor engine performance, or even engine failure. Replacing the rocker arm assembly is a necessary service to maintain engine efficiency and longevity.
This guide covers everything you need to know about rocker arm assembly replacement, including:
-
What is a Rocker Arm Assembly?
-
Symptoms of a Failing Rocker Arm Assembly
-
Causes of Rocker Arm Assembly Failure
-
Diagnosing Rocker Arm Assembly Problems
-
Tools and Equipment Needed for Replacement
-
Step-by-Step Rocker Arm Assembly Replacement Process
-
Post-Replacement Checks and Testing
-
Cost of Rocker Arm Assembly Replacement
-
DIY vs. Professional Replacement
-
Preventive Maintenance Tips
By the end of this article, you will have a thorough understanding of rocker arm assembly replacement and whether you should attempt the repair yourself or seek professional help.
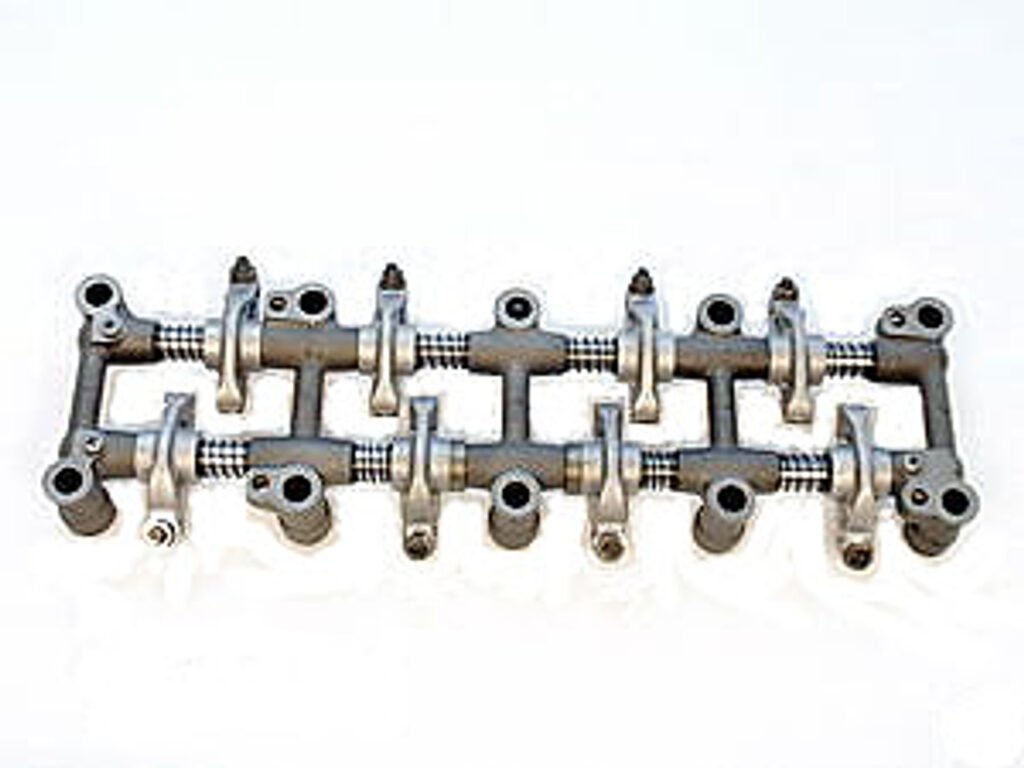
1. What is a Rocker Arm Assembly?
The rocker arm assembly is a pivotal part of the valvetrain in an internal combustion engine. It consists of:
-
Rocker Arms – Levers that pivot to open and close the valves.
-
Rocker Shaft – A mounting point that holds the rocker arms in place.
-
Bushings/Bearings – Reduce friction between moving parts.
-
Adjustment Screws/Nuts – Allow for valve lash adjustment.
Function of the Rocker Arm Assembly
-
Transfers camshaft motion to the valves.
-
Ensures precise valve timing for optimal combustion.
-
Maintains proper valve clearance (lash).
A malfunctioning rocker arm assembly can lead to serious engine damage, making timely replacement essential.
2. Symptoms of a Failing Rocker Arm Assembly
Recognizing the signs of a failing rocker arm assembly can prevent further engine damage. Common symptoms include:
A. Ticking or Clicking Noises
-
A rhythmic ticking sound from the valve cover indicates excessive wear or poor lubrication.
B. Loss of Engine Power
-
Worn rocker arms may not fully open valves, reducing engine efficiency.
C. Engine Misfires
-
Improper valve operation leads to incomplete combustion.
D. Check Engine Light
-
Faulty rocker arms can trigger engine codes related to valve timing or misfires.
E. Visible Wear or Damage
-
Upon inspection, you may find cracked, bent, or excessively worn rocker arms.
3. Causes of Rocker Arm Assembly Failure
Several factors contribute to rocker arm assembly failure:
A. Lack of Lubrication
-
Insufficient oil flow increases friction, leading to premature wear.
B. Poor Maintenance
-
Dirty oil or infrequent oil changes accelerate wear.
C. Over-revving the Engine
-
Excessive RPMs can cause rocker arms to bend or break.
D. Valve Train Misalignment
-
Improperly adjusted valves increase stress on rocker arms.
E. Manufacturing Defects
-
Low-quality materials or improper heat treatment can lead to early failure.
4. Diagnosing Rocker Arm Assembly Problems
Before replacing the rocker arm assembly, proper diagnosis is essential.
A. Visual Inspection
-
Remove the valve cover and check for:
-
Cracked or bent rocker arms
-
Worn bushings or shafts
-
Excessive play in the rocker arms
-
B. Listening for Noises
-
Use a mechanic’s stethoscope to pinpoint ticking sounds.
C. Compression Test
-
Low compression in one cylinder may indicate a faulty rocker arm.
D. Valve Lash Check
-
Measure valve clearance to determine if adjustment or replacement is needed.
5. Tools and Equipment Needed for Replacement
Replacing a rocker arm assembly requires specific tools:
-
Socket set & wrenches
-
Torque wrench
-
Valve cover gasket set
-
Feeler gauge (for valve adjustment)
-
Engine oil & assembly lubricant
-
Pry bar (if necessary for removal)
-
Shop manual (for torque specs & procedures)
6. Step-by-Step Rocker Arm Assembly Replacement Process
Step 1: Preparation
-
Disconnect the battery.
-
Drain engine oil (if required).
-
Remove any components obstructing the valve cover.
Step 2: Remove the Valve Cover
-
Unbolt the valve cover and carefully lift it off.
-
Inspect the gasket for damage (replace if necessary).
Step 3: Remove the Old Rocker Arm Assembly
-
Loosen and remove the rocker arm bolts/nuts.
-
Carefully lift out the rocker arms and shaft.
Step 4: Install the New Rocker Arm Assembly
-
Lubricate new bushings and rocker arms with engine oil.
-
Position the new assembly and torque bolts to manufacturer specs.
Step 5: Adjust Valve Lash (If Required)
-
Use a feeler gauge to set proper clearance.
-
Tighten adjustment nuts securely.
Step 6: Reassemble Components
-
Install a new valve cover gasket.
-
Reattach the valve cover and reconnect all components.
-
Refill engine oil if drained.
Step 7: Start the Engine & Test
-
Check for abnormal noises.
-
Verify smooth engine operation.
7. Post-Replacement Checks and Testing
After replacement, ensure:
-
No oil leaks from the valve cover.
-
Engine runs smoothly without misfires.
-
Valve train noise is eliminated.
8. Cost of Rocker Arm Assembly Replacement
The cost varies depending on:
-
Vehicle make/model
-
Labor rates
-
OEM vs. aftermarket parts
Estimated Costs:
-
Parts: $50 – $300 (depending on quality)
-
Labor: $150 – $500 (2-4 hours of work)
9. DIY vs. Professional Replacement
DIY Replacement
✅ Pros:
-
Cost-effective
-
Good learning experience
❌ Cons:
-
Risk of improper installation
-
Requires mechanical skill
Professional Replacement
✅ Pros:
-
Expert installation
-
Warranty on parts/labor
❌ Cons:
-
Higher cost
10. Preventive Maintenance Tips
To extend the life of your rocker arm assembly:
✔ Change oil regularly (use manufacturer-recommended oil).
✔ Monitor engine noises and address them early.
✔ Avoid over-revving the engine.
✔ Check valve lash periodically.
Conclusion
Replacing a rocker arm assembly is a critical repair that restores engine performance and prevents further damage. Whether you choose DIY or professional service, proper installation and maintenance are key to ensuring longevity.
If you notice symptoms of a failing rocker arm assembly, act quickly to avoid costly engine repairs. Regular maintenance and timely replacements will keep your engine running smoothly for years to come.