The oil pick-up tube is a critical component in an engine’s lubrication system. It ensures that oil is efficiently drawn from the oil pan and delivered to the oil pump, which then circulates it throughout the engine. Over time, the pick-up tube can become clogged, damaged, or develop leaks, leading to oil starvation and severe engine damage.
Replacing an oil pick-up tube is a necessary maintenance task, especially in high-mileage vehicles or engines that have been subjected to poor lubrication conditions. This article provides a detailed, step-by-step guide on oil pick-up tube replacement, including symptoms of a failing tube, necessary tools, and precautions to take during the process.
Symptoms of a Failing Oil Pick-Up Tube
Before diving into the replacement process, it’s essential to recognize the signs of a failing oil pick-up tube. Common symptoms include:
1. Low Oil Pressure
-
A clogged or damaged pick-up tube restricts oil flow, leading to low oil pressure.
-
The oil pressure warning light may illuminate, or a gauge may show abnormally low readings.
2. Engine Knocking or Ticking Noises
-
Insufficient oil circulation causes metal-on-metal contact, resulting in knocking or ticking sounds from the engine.
3. Overheating Engine
-
Oil helps dissipate heat; restricted flow can lead to increased engine temperatures.
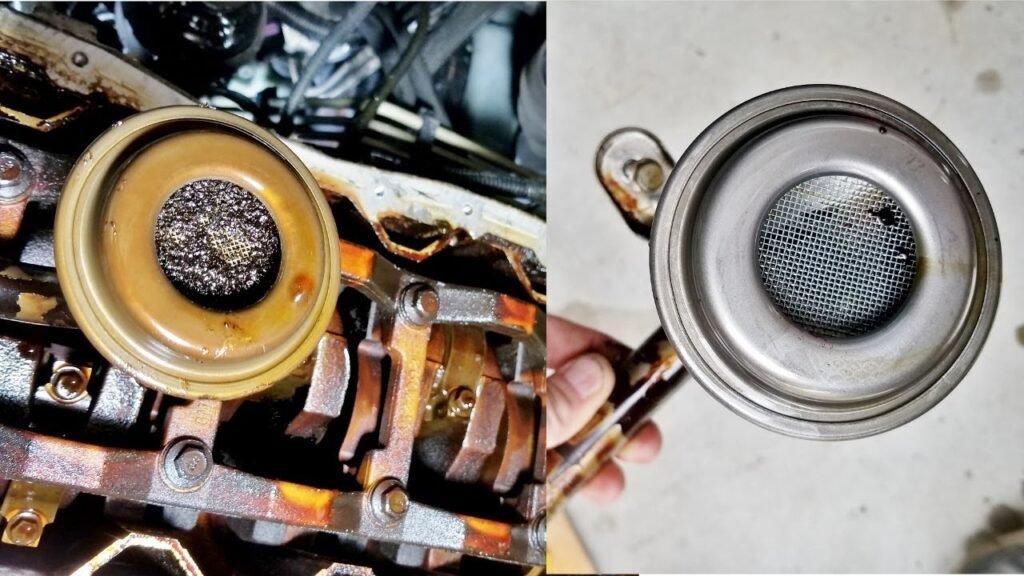
4. Metal Shavings in Oil
-
If the pick-up tube screen is damaged, debris can enter the oil system, leading to metal particles in the oil.
5. Frequent Oil Pressure Drops at Idle
-
A failing pick-up tube may struggle to maintain pressure when the engine is idling.
If any of these symptoms are present, inspecting and possibly replacing the oil pick-up tube should be a priority.
Tools and Materials Needed for Replacement
Before starting the replacement process, gather the following tools and materials:
Tools:
-
Socket set and ratchet
-
Wrench set
-
Oil pan drain pan
-
Jack and jack stands (or a vehicle lift)
-
Screwdrivers (flathead and Phillips)
-
Torque wrench
-
Gasket scraper or razor blade
-
Oil filter wrench
-
Brake cleaner or degreaser
-
Shop towels or rags
Materials:
-
New oil pick-up tube (OEM or aftermarket)
-
New oil pan gasket (if applicable)
-
Fresh engine oil (correct grade and quantity)
-
New oil filter
-
Threadlocker (if required for bolts)
-
RTV silicone sealant (if no gasket is used)
Step-by-Step Oil Pick-Up Tube Replacement Guide
Step 1: Prepare the Vehicle
-
Park on a Level Surface – Ensure the vehicle is on a stable, flat surface.
-
Allow the Engine to Cool – Working on a hot engine can cause burns and inaccurate oil level readings.
-
Disconnect the Battery – Prevent accidental electrical shorts by disconnecting the negative terminal.
Step 2: Drain the Engine Oil
-
Place an oil drain pan beneath the oil plug.
-
Remove the drain plug and let the oil fully drain.
-
Remove the oil filter using an oil filter wrench.
Step 3: Remove the Oil Pan
-
Jack Up the Vehicle – Use a jack and secure the vehicle on jack stands for safety.
-
Remove Obstructions – Depending on the vehicle, you may need to remove:
-
Exhaust components
-
Crossmembers or subframes
-
Engine mounts (support the engine with a jack if needed)
-
-
Unbolt the Oil Pan – Loosen all oil pan bolts evenly to avoid warping.
-
Break the Seal – Use a gasket scraper or razor blade to carefully separate the oil pan from the engine block.
Step 4: Remove the Old Oil Pick-Up Tube
-
Locate the pick-up tube, which is usually bolted to the oil pump or engine block.
-
Unbolt the tube carefully, ensuring no debris falls into the oil pump.
-
Inspect the old tube for clogs, cracks, or a damaged screen.
Step 5: Clean the Oil Pump and Surrounding Area
-
Use brake cleaner and a rag to remove old gasket material and oil residue.
-
Check the oil pump for wear or damage—replace if necessary.
Step 6: Install the New Oil Pick-Up Tube
-
Apply threadlocker to the bolts (if specified by the manufacturer).
-
Secure the new pick-up tube to the oil pump or engine block, tightening bolts to the correct torque specification.
-
Ensure the tube is properly aligned and not touching the oil pan.
Step 7: Reinstall the Oil Pan
-
Apply a new gasket or RTV silicone sealant to the oil pan mating surface.
-
Carefully position the oil pan and hand-tighten bolts in a crisscross pattern.
-
Torque the bolts to the manufacturer’s specifications.
Step 8: Reassemble and Refill Oil
-
Reinstall any removed components (exhaust, crossmember, etc.).
-
Lower the vehicle from the jack stands.
-
Install a new oil filter.
-
Refill the engine with fresh oil to the recommended level.
Step 9: Start the Engine and Check for Leaks
-
Reconnect the battery.
-
Start the engine and let it idle, monitoring oil pressure.
-
Check for leaks around the oil pan and pick-up tube area.
-
Shut off the engine and recheck the oil level, topping off if necessary.
Preventative Maintenance Tips
To extend the life of your oil pick-up tube and lubrication system:
-
Use High-Quality Oil & Filters – Cheap oil and filters can lead to sludge buildup.
-
Follow Oil Change Intervals – Regular oil changes prevent debris accumulation.
-
Inspect During Oil Changes – Periodically check the oil pan and pick-up tube for signs of clogging.
-
Avoid Overheating – Excessive heat can degrade oil and cause sludge formation.
Conclusion
Replacing an oil pick-up tube is a labor-intensive but crucial repair that can prevent catastrophic engine failure. By following this guide, you can ensure proper oil circulation and maintain engine longevity. If you’re uncomfortable performing this task yourself, consult a professional mechanic to avoid costly mistakes.
Regular maintenance and prompt attention to oil pressure warnings will help keep your engine running smoothly for years to come.