The radiator is a crucial component of a vehicle’s cooling system, responsible for dissipating heat from the engine to prevent overheating. Over time, radiators can develop leaks, corrosion, or clogging, leading to inefficient cooling and potential engine damage. Replacing a faulty radiator is essential for maintaining optimal engine performance and preventing costly repairs.
This guide covers everything you need to know about radiator replacement, including:
-
Signs of a failing radiator
-
Tools and materials needed
-
Step-by-step replacement process
-
Tips for maintenance and troubleshooting
By the end of this article, you’ll have a thorough understanding of how to replace a radiator safely and efficiently.
Signs Your Radiator Needs Replacement
Before replacing your radiator, it’s important to confirm that it’s the source of the problem. Here are common symptoms of a failing radiator:
1. Overheating Engine
If your engine temperature gauge frequently rises into the red zone, the radiator may not be cooling the coolant effectively.
2. Coolant Leaks
Visible coolant puddles under your car or low coolant levels indicate a leak in the radiator or hoses.
3. Discolored or Sludgy Coolant
Rusty or oily coolant suggests internal corrosion or a failing transmission cooler (if integrated with the radiator).
4. Damaged or Bent Fins
Physical damage to the radiator fins (from debris or accidents) reduces cooling efficiency.
5. Frequent Coolant Refills
If you constantly need to top off the coolant, there may be a slow leak in the radiator.
If you notice any of these signs, inspect the radiator and consider replacement if necessary.
Tools and Materials Needed for Radiator Replacement
Before starting, gather the following tools and supplies:
Tools:
-
Socket set and wrenches
-
Screwdrivers (flathead and Phillips)
-
Pliers (regular and needle-nose)
-
Drain pan
-
Funnel
-
Hose clamp pliers
-
Jack and jack stands (if needed for access)
Materials:
-
New radiator (compatible with your vehicle)
-
Coolant (check manufacturer specifications)
-
Replacement hoses (upper and lower radiator hoses)
-
Hose clamps (if not included with hoses)
-
Distilled water (for flushing if necessary)
-
Gasket sealant (if required for connections)
Always consult your vehicle’s service manual for specific requirements.
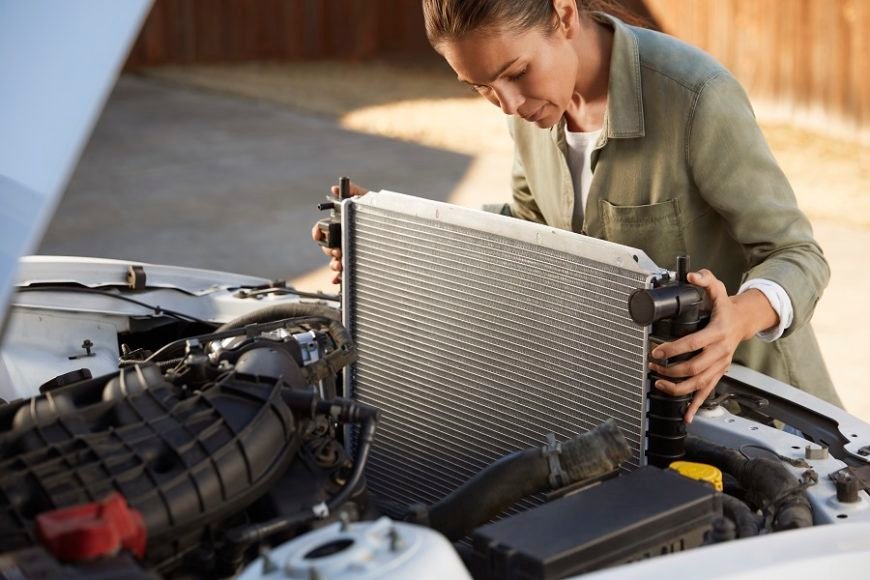
Step-by-Step Radiator Replacement Guide
Follow these steps to safely replace your radiator:
Step 1: Safety Precautions
-
Park the vehicle on a flat, stable surface.
-
Allow the engine to cool completely to avoid burns from hot coolant.
-
Disconnect the negative battery terminal to prevent electrical issues.
Step 2: Drain the Coolant
-
Place a drain pan beneath the radiator.
-
Locate the radiator drain plug (usually at the bottom) and open it to release the coolant.
-
If there’s no drain plug, loosen the lower radiator hose to drain the coolant.
-
Dispose of old coolant properly (it’s toxic and should not be poured down the drain).
Step 3: Remove the Radiator Hoses
-
Use pliers to loosen the hose clamps on the upper and lower radiator hoses.
-
Gently twist and pull the hoses off the radiator connections.
Step 4: Disconnect Electrical Connections (If Applicable)
-
Some radiators have electric cooling fans or sensors.
-
Unplug any electrical connectors attached to the radiator or fan assembly.
Step 5: Remove the Radiator Mounting Bolts
-
Locate the bolts or brackets securing the radiator in place.
-
Remove them carefully, ensuring the radiator doesn’t tip over.
Step 6: Remove the Old Radiator
-
Lift the radiator straight up and out of the engine bay.
-
Be cautious of any remaining coolant or sharp edges.
Step 7: Install the New Radiator
-
Position the new radiator in place, aligning it with the mounting points.
-
Secure it with the bolts or brackets.
Step 8: Reconnect Hoses and Electrical Components
-
Attach the upper and lower radiator hoses, securing them with new clamps if needed.
-
Reconnect any electrical plugs for fans or sensors.
Step 9: Refill the Coolant
-
Use a funnel to pour the recommended coolant mixture into the radiator.
-
Fill the overflow reservoir to the proper level.
Step 10: Bleed Air from the Cooling System
-
Start the engine and let it run with the radiator cap off to allow air bubbles to escape.
-
Once the thermostat opens and coolant circulates, top off the coolant if necessary.
Step 11: Test for Leaks and Proper Cooling
-
Check for leaks around hoses and connections.
-
Monitor the temperature gauge to ensure the engine stays at optimal temperature.
Tips for Maintaining Your New Radiator
To extend the life of your radiator, follow these maintenance tips:
-
Regular Coolant Checks – Inspect coolant levels monthly and top off as needed.
-
Flush the Cooling System – Replace coolant every 30,000–50,000 miles to prevent buildup.
-
Inspect Hoses and Clamps – Look for cracks, leaks, or loose connections.
-
Keep the Radiator Clean – Remove debris from fins to ensure proper airflow.
-
Avoid Overheating – If the engine overheats, address the issue immediately to prevent damage.
Common Radiator Replacement Mistakes to Avoid
-
Using the Wrong Coolant – Always use the manufacturer-recommended coolant type.
-
Not Bleeding the System – Air pockets can cause overheating.
-
Overtightening Hose Clamps – This can damage hoses or radiator necks.
-
Ignoring Other Cooling Components – Check the thermostat, water pump, and fans while replacing the radiator.
When to Seek Professional Help
While radiator replacement is a manageable DIY task, consider professional assistance if:
-
You’re unsure about the process.
-
The vehicle has complex cooling systems (e.g., hybrid or luxury models).
-
There are additional cooling system issues (e.g., a blown head gasket).
Conclusion
Replacing a radiator is a critical repair that ensures your engine stays cool and operates efficiently. By recognizing the signs of a failing radiator, gathering the right tools, and following a structured replacement process, you can complete this job successfully. Regular maintenance will help prolong the life of your new radiator and prevent future cooling system problems.
Whether you’re a DIY enthusiast or prefer professional service, understanding radiator replacement empowers you to make informed decisions about your vehicle’s health. Stay proactive with cooling system care, and your engine will thank you with reliable performance for years to come.