The serpentine belt is a crucial component in modern vehicles, responsible for driving multiple engine accessories such as the alternator, power steering pump, water pump, and air conditioning compressor. Over time, the belt wears out and requires replacement to prevent sudden failures that can leave you stranded or cause engine damage.
This guide covers everything you need to know about serpentine belt replacement, including:
-
Signs of a failing serpentine belt
-
Tools and materials needed for replacement
-
Step-by-step replacement instructions
-
Maintenance tips to extend belt life
-
Frequently asked questions
By the end of this article, you’ll have a clear understanding of how to inspect, diagnose, and replace a serpentine belt yourself, saving time and money on mechanic fees.
Signs of a Failing Serpentine Belt
Before replacing your serpentine belt, it’s essential to recognize the symptoms of wear and tear. Ignoring these signs can lead to belt failure, which may cause overheating, loss of power steering, or a dead battery.
1. Squealing or Chirping Noises
A high-pitched squeal when starting the engine or accelerating often indicates a loose or worn belt. This noise occurs when the belt slips on the pulleys due to lack of tension or glazing.
2. Cracks, Fraying, or Glazing
Inspect the belt for visible damage:
-
Cracks – Small cracks on the ribbed side mean the belt is drying out.
-
Fraying edges – Indicates the belt is breaking down.
-
Glazing – A shiny, smooth surface suggests slippage and reduced grip.
3. Accessory Failure
If the belt breaks or slips severely, you may notice:
-
Battery warning light (alternator not charging)
-
Overheating (water pump not circulating coolant)
-
Hard steering (power steering pump failing)
-
AC not blowing cold air (compressor not engaging)
4. Belt Tension Issues
A belt that’s too loose will slip, while an overtightened belt can damage bearings in the accessories. Some vehicles have an automatic tensioner, while others require manual adjustment.
Tools and Materials Needed for Replacement
Before starting, gather the following:
-
New serpentine belt (check your vehicle’s manual for the correct part number)
-
Socket set and wrench (for belt tensioner or idler pulley)
-
Belt routing diagram (often found under the hood or in the repair manual)
-
Flashlight (for better visibility)
-
Gloves (to protect your hands)
-
Breaker bar (if the tensioner is stiff)
Optional but helpful:
-
Belt removal tool (for tight spaces)
-
Pry bar (to help maneuver the belt)
Step-by-Step Serpentine Belt Replacement
Step 1: Locate the Belt and Tensioner
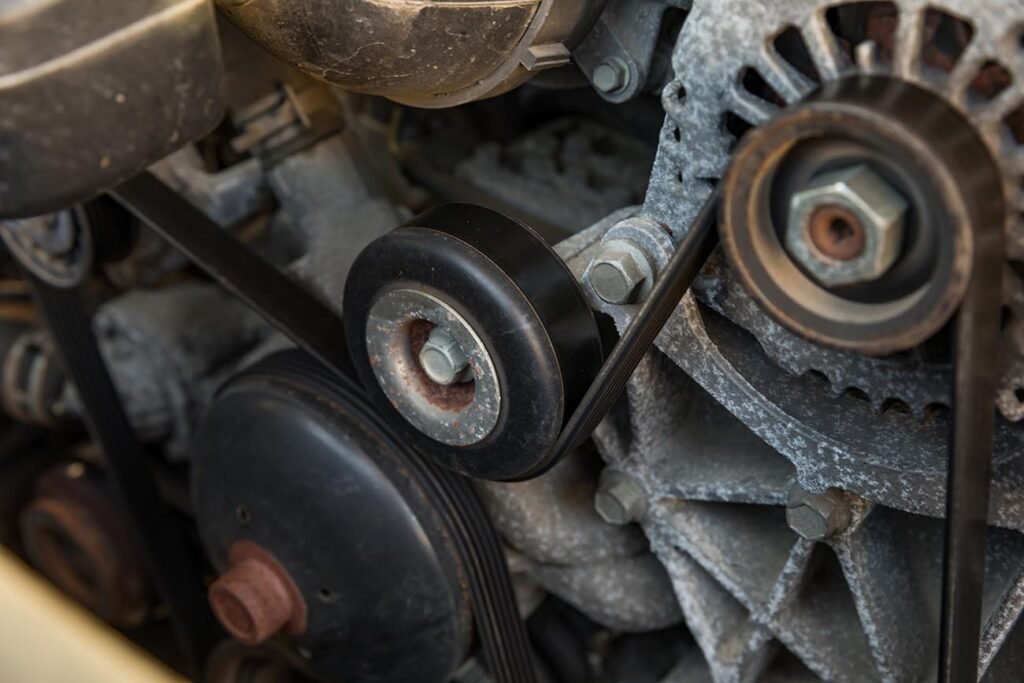
Open the hood and identify the serpentine belt. It snakes around multiple pulleys, including:
-
Crankshaft pulley
-
Alternator
-
Power steering pump
-
Water pump
-
AC compressor
-
Idler pulley (if equipped)
Find the belt tensioner—it may be spring-loaded or manually adjusted.
Step 2: Release Belt Tension
-
Automatic tensioner: Use a socket and breaker bar to rotate the tensioner clockwise or counterclockwise (check your vehicle’s specifics) to relieve pressure.
-
Manual tensioner: Loosen the adjustment bolt and move the component (e.g., alternator) to slacken the belt.
Step 3: Remove the Old Belt
Once the tension is released, slip the belt off one of the pulleys. Note the routing before removing it completely—taking a photo can help during reinstallation.
Step 4: Compare Old and New Belts
Ensure the new belt matches the old one in length, width, and rib pattern.
Step 5: Install the New Belt
Refer to your belt routing diagram or photo. Loop the belt around each pulley, leaving the tensioner pulley for last.
Step 6: Apply Tension
-
Automatic tensioner: Release the tensioner slowly, allowing it to tighten the belt.
-
Manual tensioner: Adjust the component (e.g., alternator) until proper tension is achieved.
Step 7: Verify Proper Installation
-
Spin the pulleys by hand to ensure smooth movement.
-
Start the engine and listen for unusual noises.
-
Check belt alignment—it should sit centered on all pulleys.
Maintenance Tips to Extend Belt Life
-
Regular Inspections – Check for wear every 15,000 miles or during oil changes.
-
Keep It Clean – Oil or coolant leaks can degrade the belt. Fix leaks promptly.
-
Proper Tension – Too loose or too tight causes premature wear.
-
Replace Accessory Pulleys if Worn – Bad bearings in pulleys can damage the belt.
-
Follow Manufacturer’s Replacement Interval – Typically 60,000–100,000 miles, but inspect sooner if driving in harsh conditions.
Frequently Asked Questions (FAQs)
Q: How long does a serpentine belt last?
A: Most last between 60,000–100,000 miles, but always inspect for wear.
Q: Can I drive with a broken serpentine belt?
A: No—without the belt, critical components like the water pump and alternator stop working, risking engine damage.
Q: How much does serpentine belt replacement cost?
A: DIY costs $20–$80 for the belt. Mechanics charge $100–$250 including labor.
Q: What’s the difference between a serpentine belt and a timing belt?
A: A serpentine belt drives accessories, while a timing belt synchronizes engine camshaft/crankshaft movement (critical for engine operation).
Q: Can I replace the belt myself?
A: Yes, if you have basic tools and follow the correct routing. Some vehicles have tight spaces, making it challenging.
Conclusion
Replacing a serpentine belt is a straightforward DIY task that can prevent costly breakdowns. By recognizing early warning signs, using the correct tools, and following proper installation steps, you can ensure your vehicle’s accessories function smoothly. Regular inspections and timely replacements will extend the belt’s lifespan and keep your engine running efficiently.
If you’re unsure about the process, consult a professional mechanic. However, with this guide, you’re well-equipped to tackle the job confidently and save on repair costs.